Solar Spectrum Solar Filter System
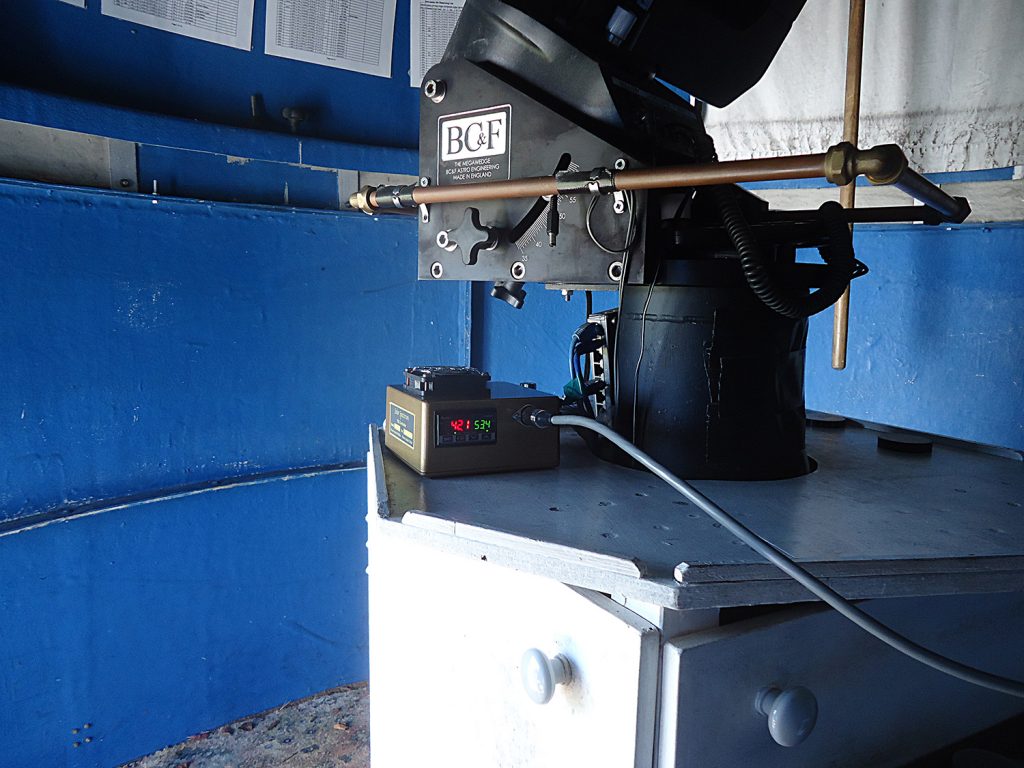
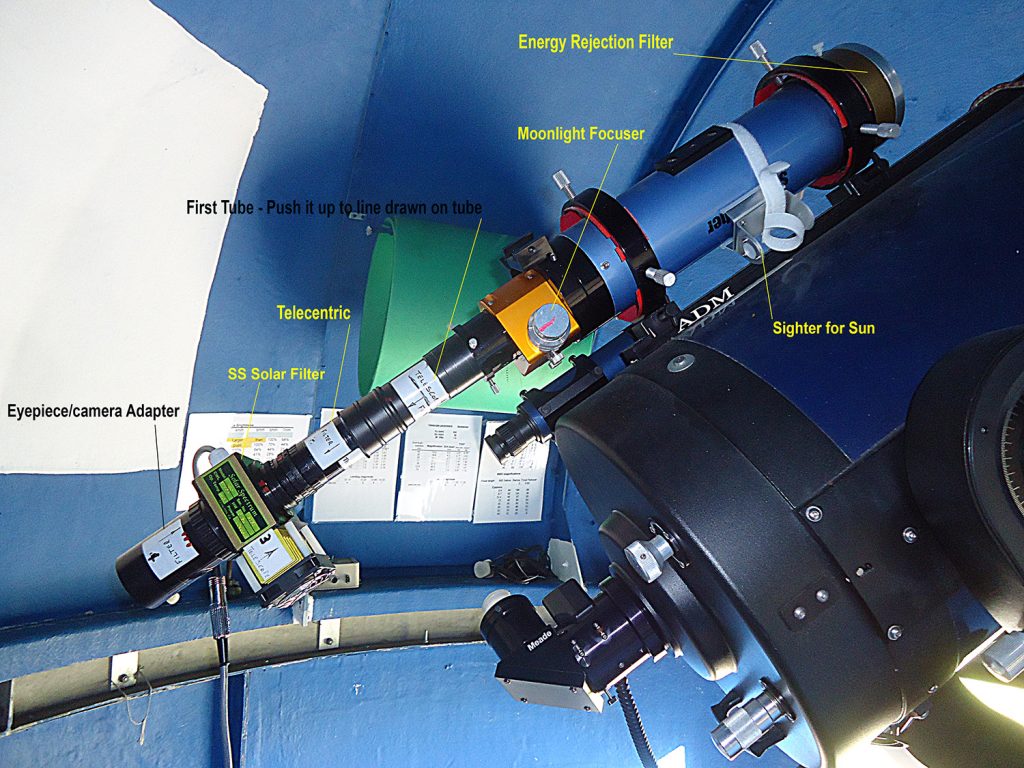
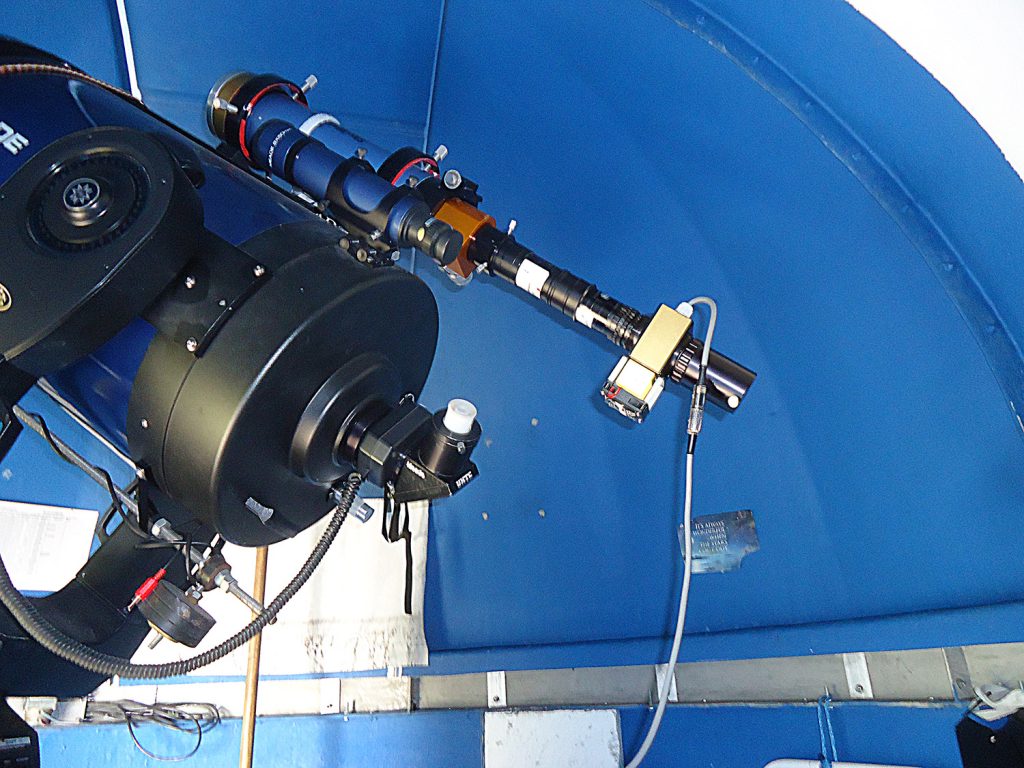
This is a filter system rather than a complete telescope, and is arranged to fit to our Skywatcher 80ED that rides on the Meade SCT in the small dome. It has an oven and a controller to control the temperature of the filter, and it is by changing the temperature that we are able to tune the filter to favour observing prominences, spots, granulations, flares etc.. With it we are also able to measure the speed of the hydrogen movement on the face of the Sun.
A specialised piece of equipment with an observable diameter of 32mm and a band width of .3Å. In changing the temperature of the filter etalon the controller allows us to place the .3Angstrom slice at different points along the Hydrogen Alpha (656Å) part of the wavelength line. The temperature can be adjusted from 44°C to 65°C, in steps of 1/10 of a degree. As a starting point try setting it at 50°C or so, but it depends on atmospheric condition.
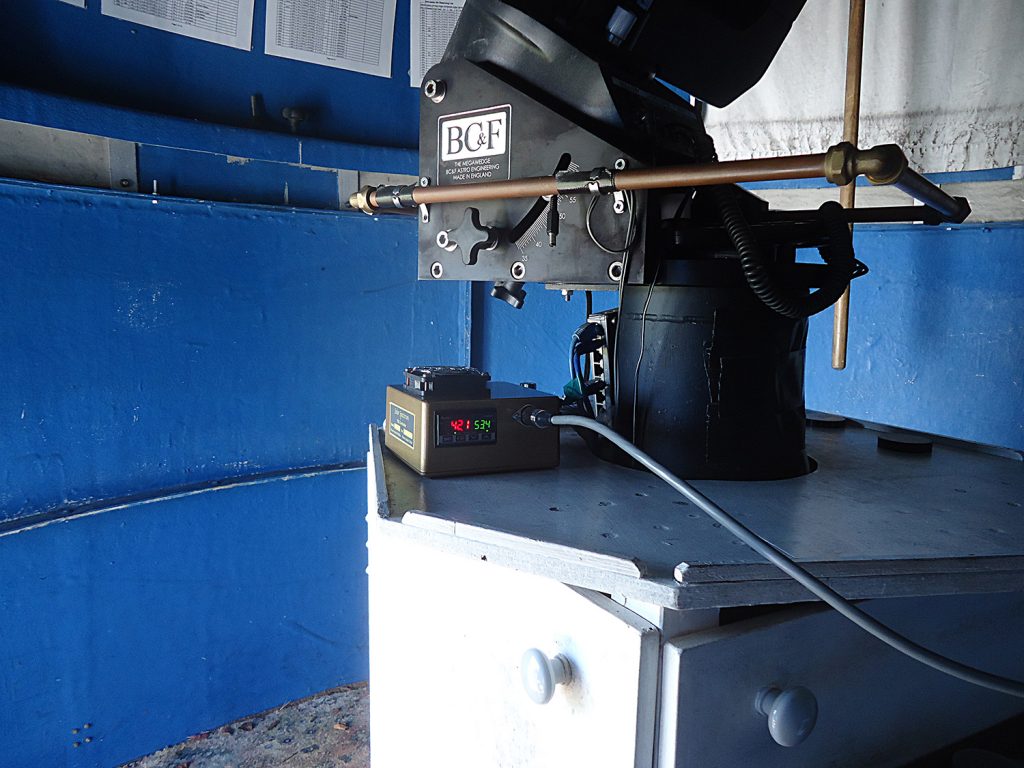
In the small dome the Temperature Controller is powered from the mains 240vac, but to take it out to schools etc. we must use a 12vdc battery, (there are 3 in the big dome’s central cupboard), and the 240vac inverter.
Not only is this a specialised piece of equipment, but it will be sat on a telescope pointed at the Sun, so make sure that the Sun cannot get at the main telescope or the finder or past the 80ED into your eyes. Use the shield hanging on the dome wall for this. Use the Sun finder strapped to the tube of the 80ED to locate the Sun, or use the Meade’s shadow to centralise it in the filter, though this can be time-consuming.
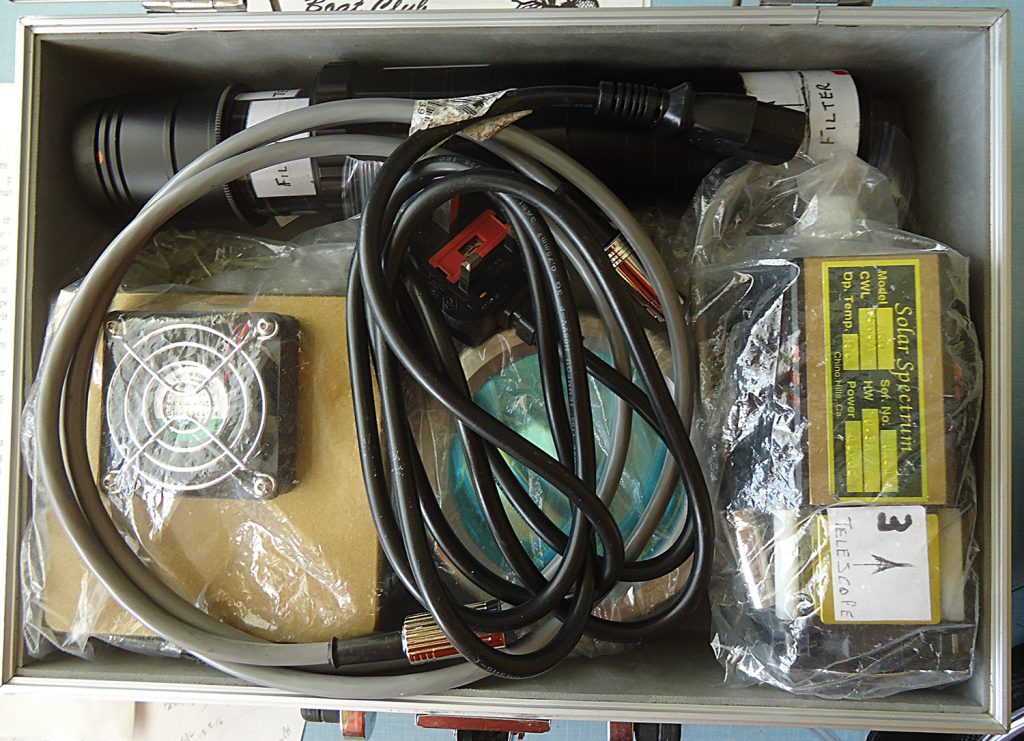
In addition to the filter, stored in the Box are,
tubes to connect it to the Skywatcher and to an eyepiece or camera with either a 2″ or 1.25″ adapter.
A 4X telecentric to slow the F/7.5 Skywatcher system to F/30 to suit the filter,
an Energy Rejection Filter,
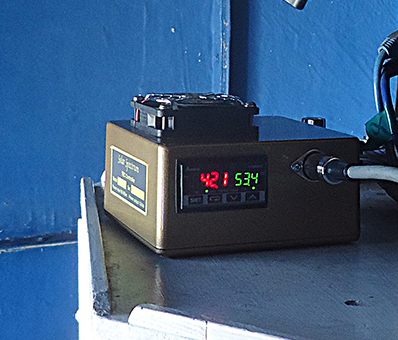
the Temperature Controller,
and suitable connection wires from the mains socket to the controller and from the controller to the filter.
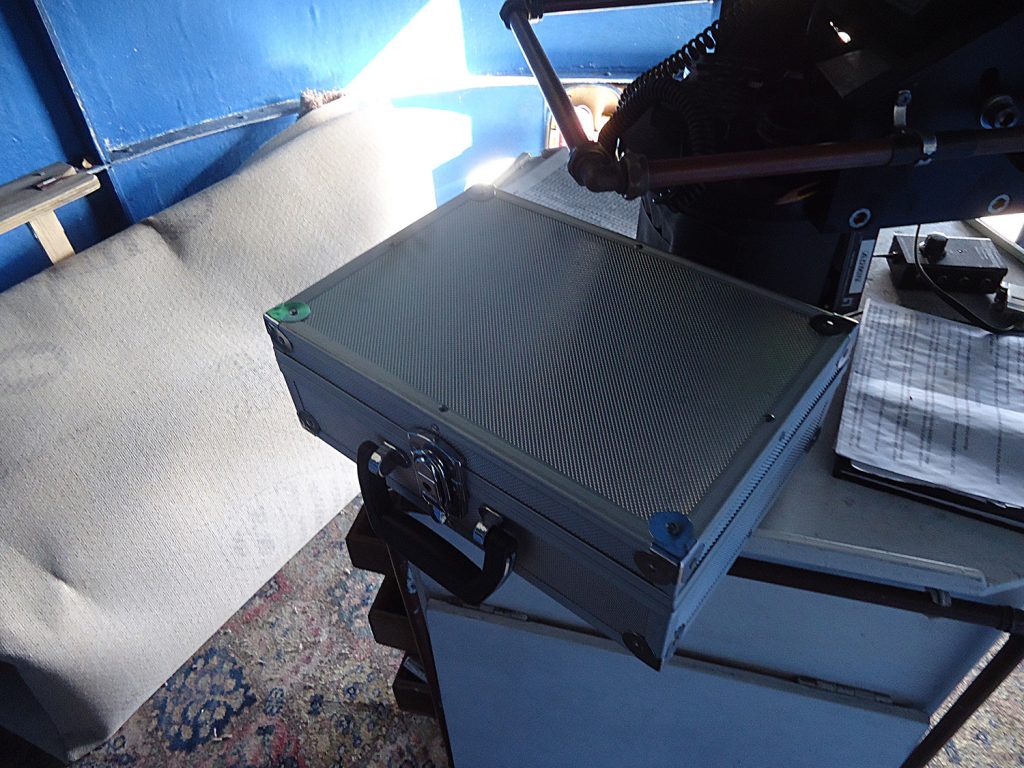
The whole system is contained in an aluminium box, seen here.
The items must be carefully replaced as they will not fit easily unless placed in the manner shown. They are all quite delicate and costly, particularly the filter itself and the ERF, so be careful in storing and in assembly and dis-assembly.
Setting-up the System
The 80ED is located on the Meade towards the rear for visual and photographic convenience, but for solar work it would better balance the whole system to un-clamp the rings holding the 80ED and slide it along the track on the Meade to move it towards the front. Re-clamp tightly again.
Remove the 80ED’s dew shield and replace it with the ERF, securing it in place with two nylon thumb screws, not tightly.
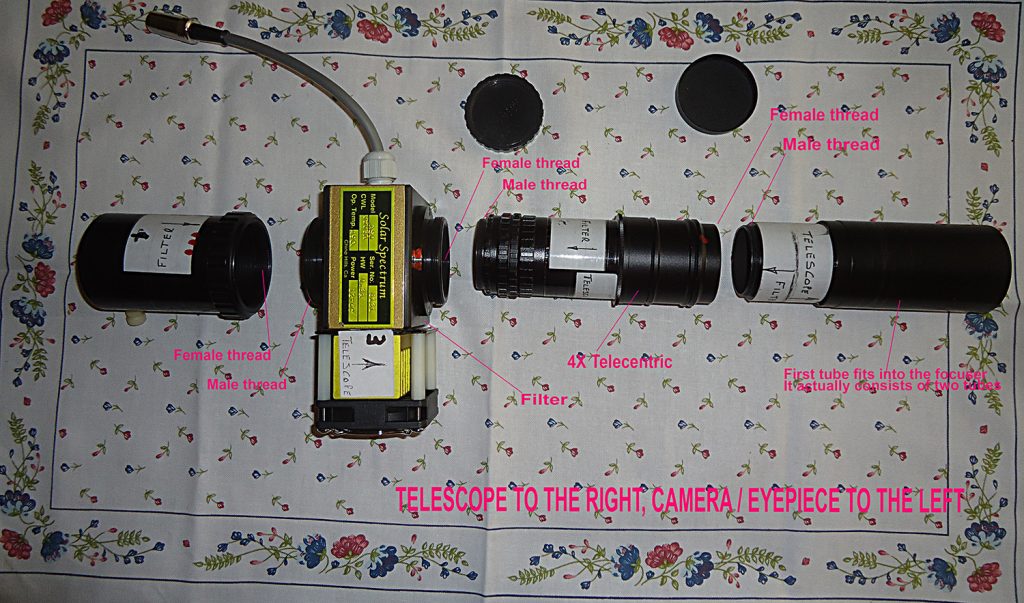
Connection of the parts at the rear of the telescope involves 4 items and all are labelled for direction.
a. The 3″ long tube with the 40mm long tube attached to it go into the focuser as one, keep them together as one piece. It’s rearmost end is a 42mm male thread.
b. The telecentric’s female thread (under the slip off cap) screws to that.
c. The filter’s female thread screws onto the telecentric’s male thread (under the screw on cap).
d. The 2″ bore tube screws onto the 52mm at the rear of the filter. This carries, eyepiece or camera.
A double check as to the fitting of the filter. The glass of the filter should look RED when looked at from the REAR, and it should look YELLOW when seen from the FRONT.
It is easier to assemble the parts on the table before loading them as one piece to the focuser.
When fitting the assembly to the telescope, note that the assembly is quite long, push the tube end into the focuser, up to the pencil line on the tube, for convenience of focusing, keep the whole assembly as short as reasonably possible to reduce the overhang. The overhang isn’t a great problem in itself, but hitting it with your head is, so be careful particularly when a camera is used.
Securing all these parts together will make a single strong stiff tube, and with a camera sat at the end it will be quite ungainly so take care.
A point with photography, should you see a series of “waves”, “bands”, “broad lines” or some such markings across the screen, loosen the camera and re-fasten it slightly “bent”, not by much, but enough to remove the banding. It will not put anything out of focus.
Setting the temperature of the oven
Connect the controller to the filter with the grey cable with DIN ends. Connect the controller to the mains with the kettle cable.
To change the temperature, press the SEL button on the left of the small panel. The Green number on the right will vibrate slightly, in anticipation(?). This is the Set temperature. Below it are the arrow buttons, up and down. Press on one of them and hold down to change the temperature you want the controller to be set at. When you have reached the temperature you want, re-press the SEL button, and the Red number, the actual temperature of the oven, will start to change to approach that of the Set Green number. When it reaches the same temperature as the Set Green number allow a minute for it to stabalise, then start to observe.
To re-calibrate the filter/telescope system, for the first time as it were, press the down arrow to reduce the set temperature to 45°, and press the SEL button again to tell the controller that you have selected that temperature, and let it get there and settle, up to 5 mins.
Re-set upwards by 1°, and allow to settle again. Repeat in 1° increments to achieve maximum contrast, this should be somewhere near 49°.
This is a job that needs doing only once. After this process set the temperature generally to seek prominences towards the 52° to 53° area and granulations towards 48°, or wherever you wish.
BJ-22.2.16.
Copyright © 2018-21 Doncaster Astronomical Society. Registered Charity No: 1091486
